


Installation Instructions
The following is a guide that covers how to set up your new Cerulean template on your J site. Here you can find an overview of the files included in the Cerulean release and instructions on installing and activating the template in your Joomla! install.
Note: The Bundle Template is only necessary if the G Library is not installed at /libraries/gantry directory.
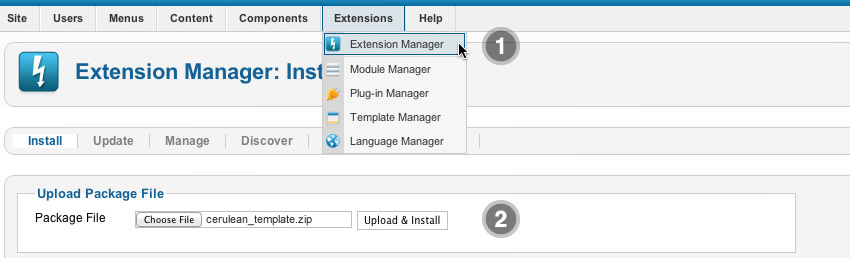
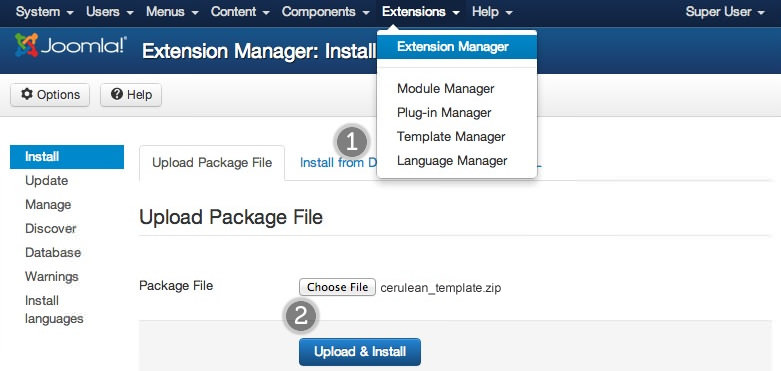
Step 1 - Installation
- Install from Admin → Extensions → Extensions Manager
- Browse for rt_cerulean.zip and click Upload & Install
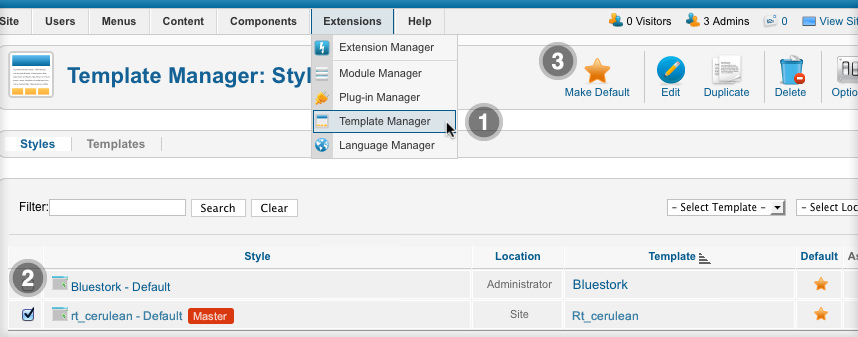
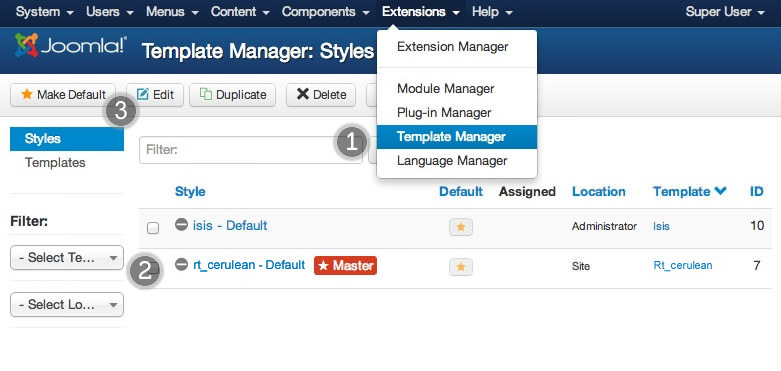
Step 2 - Template Default
- Make the template default at Admin → Extensions → Template Manager
- Select rt_cerulean
- Press Make Default
RLauncher Instructions
We always recommend installing a RLauncher first to trial and understand the template more effectively. It must be installed as new, and not over an existing Joomla install.
Step 1 - Upload
- Download the RLauncher
- Unzip the file
- Upload the created folder to your server
Note: You can upload all the files via FTP, or use cPanel or SSH to upload the zip and unzip directly onto the server. Enquire with your hosting provider.
Step 2 - Installation
- Go to www.yoursite.com/*folder name*
- Follow the Installation instructions
- Ensure you click Install Sample Data during installation
- Remove the installation folder in the Installation interface